
San Pedro, the desert town
New Journal 19 – Our itinerary for the US
We’ve got a very rough itinerary for our 6-week US journey. Rachel and I don’t do completely ridged plans – we like to remain a touch flexible. We’ve also been a bit vague in certain places by just writing the states. We’re still doing research on national parks etc.
We would, however, like to invite photogs in the US to join us at any point in our journey. Or even if you have some good advice for us, that would be great. There’s nothing quite like sharing your adventures with other people. This is a 100% photography trip where I hope to take advantage of as many sunsets, sunrises & blue hours as possible. For that reason I’m not organising any photowalks, which can be rather time demanding. Instead, feel free to drop me an email or comment below if you’d like to meet up, take some photos and chat photography 🙂
Our itinerary (subject to change)
12 June NYC for 5 nights.
17 June Chicago for 3 nights
21-22nd Minneapolis (friends’ wedding)
– Exact dates unknown from now on –
Colorado
Utah
Nevada
Arizona
San Diego
LA
California
Oregon
The Cool Bits – Technical Info
Processing Time: 1 hour
Processing method: Photoshop & Photomatix
No. of Exposures: 3 + Milky Way image
EV Range: -2 0 +2
Aperture: f/9
ISO: 160
Focal Length: 10mm
Lens: Sigma 10-20mm
Camera: Canon 60d
Plugins: Nik Color Efex for detail extraction, vignette & colour correction
Luminance Masks: N/A
Photomatix Settings: Default, Strength 100 > Saturation 38 > Luminosity 1 > Lighting Adjustments 6 > Gamma 85
Join Me on Facebook or Google+
![]()
![]()
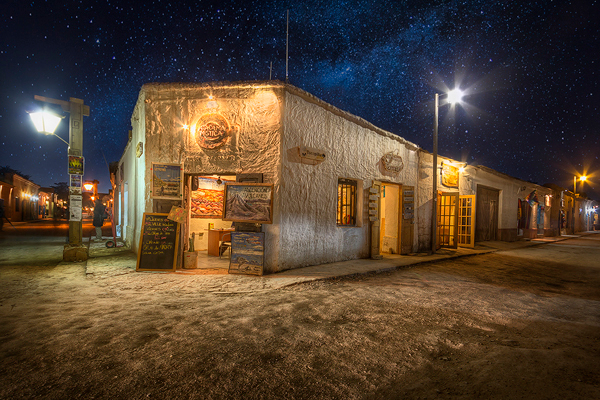
Today’s Photo – San Pedro, the desert town
Th workflow for this image was slightly different to my usual style, if I have a usual style. After processing in Photomatix, I removed the sky and replaced it with that of the 0 exposure which was free from noise and had the ideal level of luminosity.
Once I added a few filters in Nik Color Efex and a few curves adjustment layers in Photoshop I then considered the image finished. I felt, however, it was a little flat. I took the a Milky Way shot that I’d taken that night at the observatory and added that to the mix. The image, for me, sprang to life almost immediately with this addition.
Soon I will write a short tutorial on how to add stars/the Milky Way to sky in a few clicks of a button. I’ll include a free, full-size Milky Way shot for you to use should you not have one of your own.
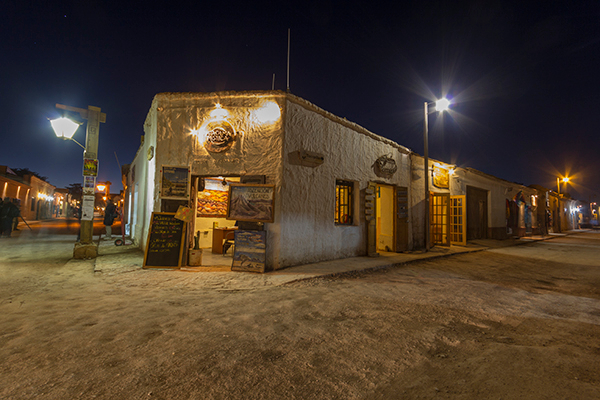
Before the Joys of Post-Processing
Share this:

This entry was posted on Sunday, June 9th, 2013 at 1:32 pm
You can follow any responses to this entry through the RSS 2.0 feed.
Very nice work! How did you go about replacing the sky with the graduated spill of light from the light sources? Or were these overlaid over the top of the milky way sky?
Hi Richard, the entirety of the sky was taken from the 0 exposure, including the street lights. The stars were then layered on top with Lighten blend mode to remove darker elements from the sky shot.
I sooo love this shot. Talk about taking a walk back in time. Take away the electric lights and you could be back in the 19th century. As for you U.S. itinerary Jimmy…You sure you don’t need someone to carry your gear? lol
Haha, maybe I could do with a camera-caddy 🙂