Metropolitan Cathedral of Santiago
New Journal 17 – And the journey continues
The mysterious dry-lands of the Atacama desert are calling us. We leave in an our on another long (24 hour) bus journey. We’re soon to wave goodbye to Santiago firm in the knowledge that we will be back, sooner rather than later.
The city has everything we love in modern city; beautiful parks, cafes, clean streets and lots of energy. The Chileans here seem relaxed, unlike in London where to pace is set to 100%.
No internet access for 24 hours – after a time away from the tinterwebs, I always look forward to seeing what’s new in this cyber world we’ve created, especially in the fast paced field of photography.
The Cool Bits – Technical Info
Processing Time: 2 hours
Processing method: Photoshop & Photomatix
No. of Exposures: 3 x 3
EV Range: -2 0 +2
Aperture: f/7.1
ISO: 160
Focal Length: 10mm
Lens: Sigma 10-20mm
Camera: Canon 60d
Plugins: Nik Color Efex for detail extraction and shift in lighting
Luminance Masks: N/A
Photomatix Settings: Default > Strength 90, Saturation 40, Luminosity 1, Lighting Adjustment 4, Gamma 92
Join Me on Facebook or Google+
![]()
![]()
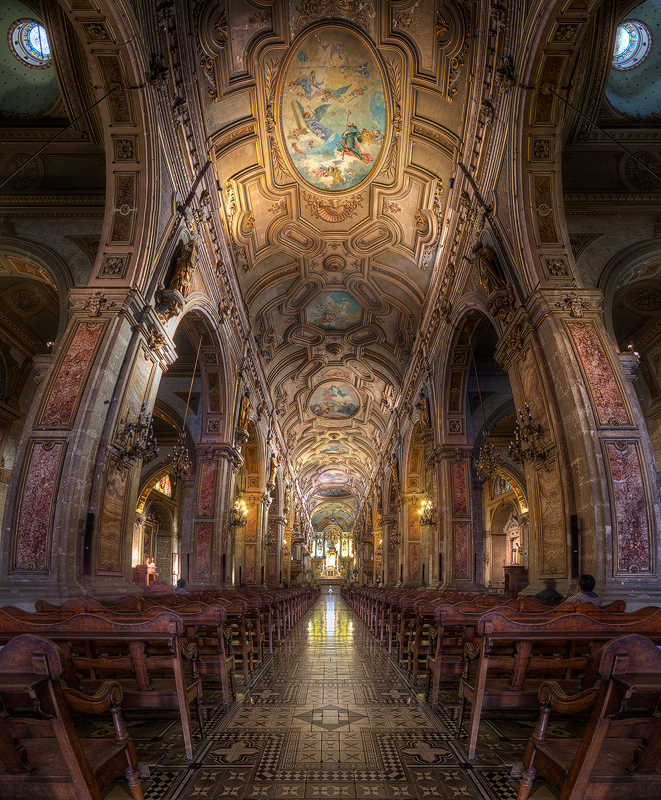
Today’s NDR Photo – Metropolitan Cathedral of Santiago
When shooting vertormas, the task of stitching is made a lot easier if you’re as close to the centre as possible and level. Not only will there be less lens distortion to correct in post, Photoshop will have an easier time in stitching the images together.
Chromatic aberration has a habit of rearing its ugly head in high contrast scenes like this. I’d strongly recommend you preparing the images beforehand in Lightroom or ACR (Enable Lens Profile Corrections & Remove Chromatic Aberration). If you were forced to use a high ISO, lightly removing noise before processing in Photomatix will help you control noise. Excessive noise removal will negatively effect the finer details, so it’s important to find the right balance.
This is the first photo that I’m classing as an NDR, a new way to classify HDR photography that I’ve been discussing with a few others in the world of HDR. NDR stands for Natural Dynamic Range and is an accurate way of describing images that fall into the HDR category but that do not resemble surreal HDR. In essence, an NDR image should be a fairly accurate representation of the original scene, in both distribution of light and rendering of colours.
Reminder – Download Luminance Mask Actions
You can download my 18 point luminance mask actions for Photoshop completely free – [wpdm_file id=1]
Before the Joys of Post-Processing


Share this:

This entry was posted on Wednesday, June 5th, 2013 at 1:34 pm
You can follow any responses to this entry through the RSS 2.0 feed.
Hi Jimmy,
is this shot on tripod or handheld? I did the similar shot with handheld and resulted with a lot of distortions that cannot be fixed during stitching process.