The Jay Prtizker Pavilion
New Journal 28 – Chicago shinnanigans
We knew our first day in Chicago would be an eventful one. The awesome HDR photog that is Chris Smith agreed to put his life on hold for a day and come to meet us. He came prepared. With a list of great places to visit, and the loan of Chris’ tripod (mine is dead), we ventured out into the big bad world of the Chicagoans.
With every rejection (some places weren’t keen on us shooting there), we matched it with a successful shot. When we needed to ask for permission to shoot, Chris would tell me to put on a good English accent (my accent is barely recognisable as English). Apparently that could work in our favour. He was right.
We slowly ticked day-time destinations off our list (interior shots only). As the sun began to fall, we were joined by a group of local photographers. I was conscious of the fact that the things I wanted to shoot they’d probably already shot many times before. But it was good to chat and get advice on locations. We also met a photographer, Beboy, who I met in Paris, and his girlfriend. It’s funny how small the world of the photographer is.
I spent the morning looking through my images, not knowing where to start. The image I’ve used today was inspired by one of Chris’ that I’d seen when I first came into contact with him. I was excited about processing it. Anyway, more about the image later.
This is the second city where we’ve been overwhelmed by the generosity of a local photographer who has given his time up to show us around. Rachel and I send a big thanks to Chris and that guys who came out last night.
p.s. we like Chicago so much we’ve extended our stay by another night.
The Cool Bits – Technical Info
Processing Time: 1 hour and 30 minutes
Processing method: Photoshop & Photomatix
No. of Exposures: 2×3
EV Range: -2 0 +
Aperture: f/6.2
ISO: 100
Focal Length: 10mm
Lens: Sigma 10-20mm
Camera: Canon 60d
Plugins: Nik Color Efex for detail extraction, shift in lighting & color correction
Luminance Masks: N/A
Photomatix Settings: Default> Strength 100 > Saturation 36 >Luminosity 1 > Lighting Adjustments 4 > Gamma 86
Join Me on Facebook or Google+
![]()
![]()
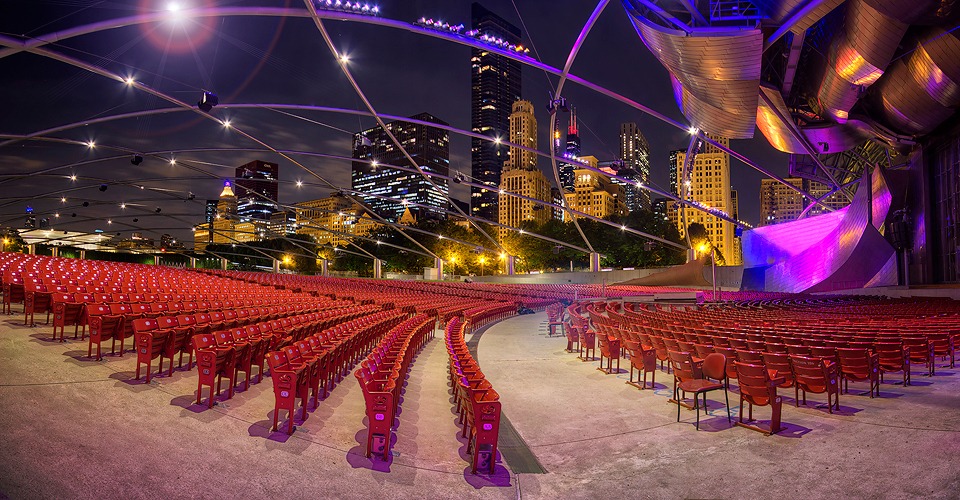
Today’s Photo – The Jay Prtizker Pavilion
This is a 2×3 image panorama. When shooting a panorama, like every other shot, I focus manually through Live View and will choose an area of medium lighting on which to set my 0 exposure (done in Aperture Priority mode). Basically, I point the square thing on Live View at an area of medium luminsoity in the scene. However, since this is a panorama, I must then swivel the camera around and shoot again, eventually stitching these two images together in Photoshop. It is important, therefore, that these two sets of brackets are similarly exposed and have identical WB settings. Therefore, when I compose my second shot, I will try to keep the square thing on the same point of luminosity if it’s visible, or look for an area within the new composition with similar luminosity.
Alternatively, you could do all of this in Manual. It is certainly easier to keep all variables constant but I know most HDR photographers like to shoot in Aperture Priority.
I added the light in the top left hand corner through a plugin called Knoll Light Factory. I felt the image was a little bit flat initially. After some experimentation I managed to settle on an effect I liked.
Reminder – Download Luminance Mask Actions
You can download my 18 point luminance mask actions for Photoshop completely free – [wpdm_file id=1]
Before the Joys of Post-Processing


Share this:

This entry was posted on Thursday, June 20th, 2013 at 5:47 pm
You can follow any responses to this entry through the RSS 2.0 feed.