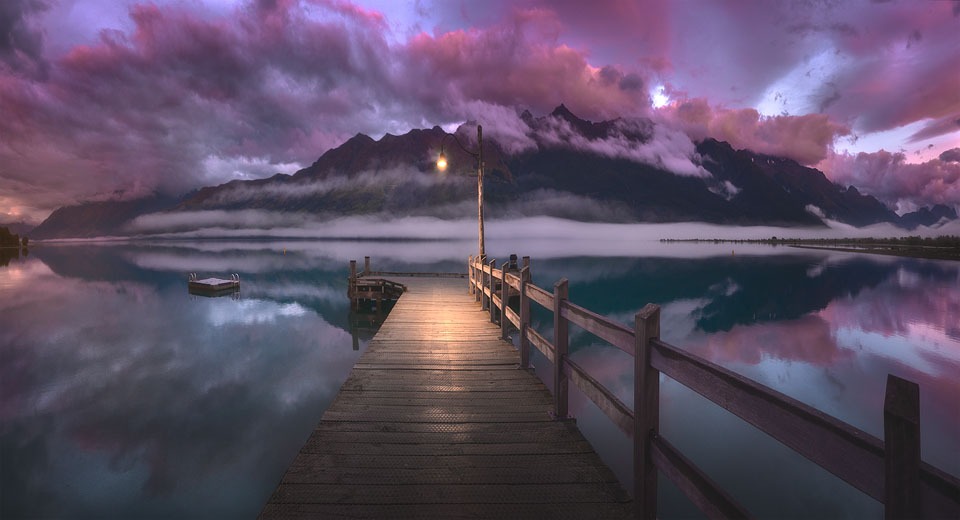
Pink Sunrise at Glenorchy Jetty
Epic Sunrise Glenorchy
__________________________________
Hey guys! I have a question, if you’ve got a minute. If you’re a regular visitor to the blog, do you find the post-processing description and the before/after comparisons useful?
I’m just wondering if it is something I should continue, or if it’s not really helping much. Thanks!
__________________________________
Last week I booked myself into a hotel for 8 days so that I could record/write a few tutorials. I’ve also been working on the presentation I’ll be giving at this year’s Out Of Chicago conference. It’s a mixture of personal anecdotes and ideas that I think people will find useful, and some awesome post-processing tips.
I don’t make many public appearances, organise photowalks, or conduct workshops. But since I’d planned to be in the US at the time of the conference, I love Chicago, and thought it might be a fun experience, I decided to accept the invitation.
If you happen to be going to the conference, I’d love it you could email me via the contact form on this website and tell me what post-processing technique you would love to see demonstrated at the presentation.
Sorry that my blog post is a bit short today. Time is a wee bit tight right now, but thank you, as always, for stopping by.
________________________________________________________
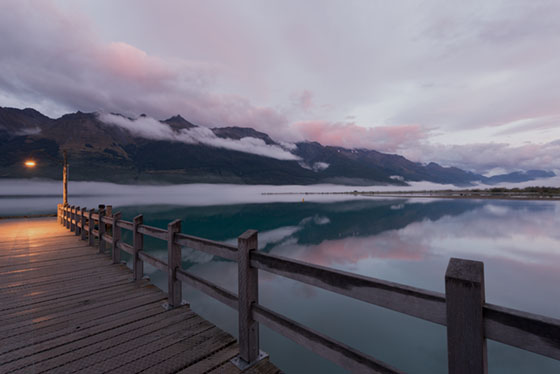
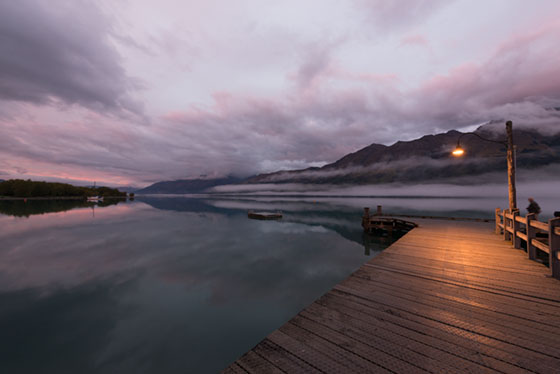
How I Created The Image – Before/After Post-Processing

The Cool Bits -Technical Info
Processing Time: 40 minutes
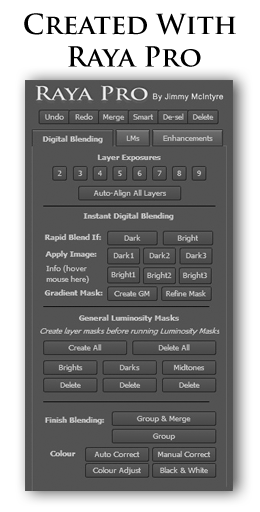
Exposure Blending method: Gradient Mask in Raya Pro
No. of Exposures: 6 (3 tile panorama, using 2 exposures for each tile)
EV Range: -2, 0, +2
Aperture: f/6.3
ISO: 800
Focal Length: 14mm
Lens: Nikon 14-24 f/2.8
Camera: Nikon D800
Plugins: Nik Color Efex
Luminosity Masks: used to create softer shadows.
Workflow Explanation – Glenorchy Jetty
This image was created using Raya Pro – The Photoshop Plugin.
This image is composed of 6 exposures. Three tiles were used for the panorama, while each tile was made up of two exposures – one brighter exposure for the foreground and a darker exposure for the background.
I blended the exposures using a Gradient Mask in Raya Pro, and then I stitch the tiles together. I corrected most of the barrel distortion using both Distort and Adaptive Wide Angle. There is still a little distortion left, but since I was looking to create a slightly surreal mood here, it wasn’t anything I found too worrisome. You can see how I correct distortion in this tutorial: Photoshop Secrets 20: Easily Remove Distortion (Perspective & Barrel)
The RAW files above really don’t do justice to quite how colourful the scene was. The mixture of blues and pinks, as blue hour met early sunrise, was stunning. With a couple of contrast adjustments and a Hue/Saturation layer I darkened the image and deepened the colours somewhat.
I stretched the image upwards using Distort because the mountains in the background, although not very large naturally, were flattened even more by shooting so wide.
I dodged the highlights in the water to emphasize the reflections. I added a customary Orton Effect with Raya Pro, and softened the shadows and darkened the midtones for a deeper mood. I actually have a YouTube tutorial coming out soon talking about these techniques.
In Nik Color Efex I used the Pro Contrast filter to bring out more detail in the clouds.
And I finished by creating a custom vignette that you can learn to do here: Quick Photoshop Secrets 9: Awesome Vignette For a Moodier Scene.
Finally, the image was sharpened and resized using my free sharpening tools, which you can download here: Quick Photoshop Secrets 16: Perfect Sharpening & Resize for the Web
As always, I hope you found this useful.
Jimmy

Share this:

This entry was posted on Sunday, May 1st, 2016 at 1:55 pm
You can follow any responses to this entry through the RSS 2.0 feed.
The before and after is extremely useful for me, I love to see what you can do and how you do it as I can then try to apply your techniques on my own photos. It’s a great learning tool!
The post-processing description and the before/after comparisons is absolutely useful! It’s part of what sets you apart from other photographers.
Before/after photos and description are always useful!, but I personally would prefer seeing the editing in a video tutorial, I’m more of a visual learner and by watching your youtube videos I’ve learned a lot, maybe even if you do a speed-up video of the editing would help a lot, but the blog is always useful too, Thanks a lot for all the info and tips!
I love the before and after photo because as an amateur photographer myself I sometimes wonder what differentiates my photos from a pro. Why are their photos so striking and mine so average 😕 it’s good to see how you guys blend the before pictures and how it’s edited to come up with such amazing pictures. A real inspiration you are, thanks for sharing!
Hi Jimmy,
please continue the before/after comparisons. Although it may lead to only copy your style of post processing but it is also a source of inspiration.
Best regards,
Jens
Please, keep on! Really love it, it’s a useful tool for me
Extremely interesting .. and useful to know all the tech details. Thanks!
Yes please continue with the post-processing and before/after. It is the reason I come to your blog! I have Raya Pro and I’ve learned a lot from you. Thanks for sharing!
Yes, likewise I like the post-processing before/after, though have to admit I keep meaning to read them in more detail at a later date… that keeps getting postponed. 😛 I also have your Raya Pro and will get round to experimenting with it more. Just enjoy seeing your awesome images really! Especially of your NZ trip, being a Kiwi (in London).
Please keep them coming there GREAT
Barry
Yes, seeing the starting point and where you can take it is very enlightening.
Absolutely do continue with these. Most helpful!
Absolutely keep them coming Jimmy and thank you for doing them. I think watching an image go from RAW to finished product is quite inspiring and provides a much needed lesson.
I’m a young photographer myself (new, that is – this isn’t an age conversation!!) and a fairly experienced photoshop aficionado, but I learn equal parts about each from your tutorials. More so, I draw inspiration from your breathtaking photographs, and the stories of how you took them as well as the explanations of your work process. You’re the only photographer I follow, and it’s the technical aspect as well as the beautiful finished product which draws my interest.
Awesome image and I appreciate your efforts to bring us these excellent tutorials. Please keep them coming!
I will be attending the Out of Chicago Conference in June. Sadly, I can’t be at your all day workshop. However, I plan to attend one of your shorter presentations. You really excel as a teacher and I think that going through your typical workflow for a photo from capture through post processing would be valuable to most people. I always learn a lot from your posts and really appreciate all of the time you put into them. I’ll be excited to meet you in Chicago!
Re: “…do you find the post-processing description and the before/after comparisons useful?
I’ve just come across your blog but I have to say I’m really impressed with both your images and prose. I think you’ve struck a perfect balance of technical instruction and informal photographic journal. A pure delight to read.
Jimmy: Thank you for the tutorials. Yes, I do enjoy seeing the before and after images, as well as the workflow description. I would be unable to do much with Raya Pro without viewing your video recordings.
Thanks so much, Jimmy! The format of this page is great. Most professional photographers are hesitant to show a before picture, much less describe the process for getting from point A to point B. Kudos to you for breaking through the myth that a picture must be straight out of camera to be worthy. Learning your ideas for planning, acquiring, and processing your photos is a joy, and I am becoming a better and more confident photographer by following you.
I’ve never been able to take a good panorama with a wide angle lens. How do you do this?
Hi Jimmy re your question – personally yes for example I pretty much always stitch and then try and blend rather than blend and then stitch, sometimes my way ends up with too much cloud movement afterwards when I try to align but I guess if you have already blended then you are working like for like anyway as an example. second point I would never have considered stretching a mountain range. That should answer your question.
As far as i am on the road panel of Photography, the best tools assist me to end up with satisfactory mind is only raya pro under unique performance. i do love and works without Rayapro is impossible.
Thanks jimmy and hope the new version will be attend continuously further.
I’ve only just discovered your blog, but the before and after comparisons and descriptions of your post production are fabulous and I’m definitely planning on going back and reading through them. Seeing the steps a photo goes through is extremely interesting and also helpful in my opinion, and I wish more photographers were willing to share how their photos looked coming off the camera.
Jimmy, I have been a customer for a long time but the Login email address that I used is no longer available. I received your to me update email for the new
Raya Pro 2. My new email address is kundabungkid@bigpond.com
Hi Ian,
You can still log in with your original email address, and then update to your new email once you’ve logged. I checked and your log in works. Here is the link: http://www.shutterevolve.com/raya-pro-user/
Have a nice day!
Jimmy, I used the link you provided and was unable to login with my old email address and pw. The old email address was kundabungkid@kundabung.com.au (This address is no longer active). My replacement email address is kundabungkid@bigpond.com Can you change the email address for me please with a temp PW and I will update the PW or do you have a simpler method . Sorry tobe a PITA .
Hi Ian, I just checked it and it worked great. The address you gave isn’t the one we have for you, so that is where the confusion is coming from. The one on record begins with ‘IE’. Could you give it one more go please and let me know if you have any difficulties.
Thanks Ian!
Jimmy
Jimmy My apologies. IE is my Prime Mailbox . The download worked fine thanks. Will contact you if I have any further problems but all should be good. Much appreciated your fast replies. Ian D
Hi Jimmy, first of all absolutely stunning image as always. I’d like to know where this is, can you provide a location?