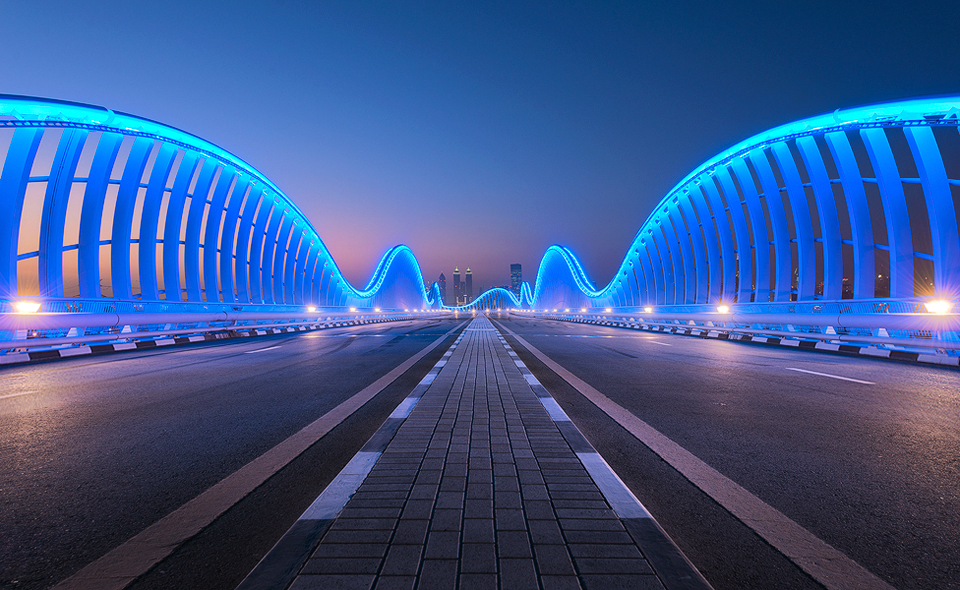
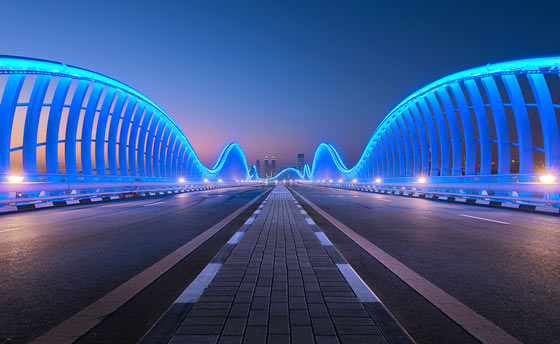
Fit For a Sheik – Meydan Bridge, Dubai
New, Precise Luminosity Masks
Over the last few weeks I’ve been experimenting with luminosity masks in order to create a more accurate way of digital blending. I’m delighted to say that I have created a set of masks that are much more successful at separating tones, giving us a cleaner selection. Sadly, these new masks will only work in the newest version of Photoshop (CC2014).
As you can see in the example images below, with classic luminosity masks, which are still a valuable tool, it was difficult to make a clean selection of the sky, or other highlights. But with the new masks, we’ve been much more successful in separating the midtones and highlights, giving us a stronger selection.
 Having said that, sometimes we don’t wish to have such a clean selection in digital blending. Sometimes it is more important to have a gentler gradient between tones, so that the blending process is smooth and natural. As digital blenders, having both the classical masks, and new masks available to us, will give us a greater range of options in the search for clean digital blending.
I will be sending all of my email subscribers the free actions for these new masks on Wednesday. If you’d like to receive them, and aren’t a member of my newsletter community, you can sign up here for free: Photography Newsletter
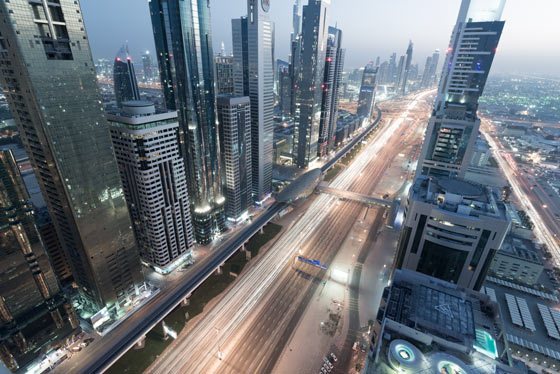
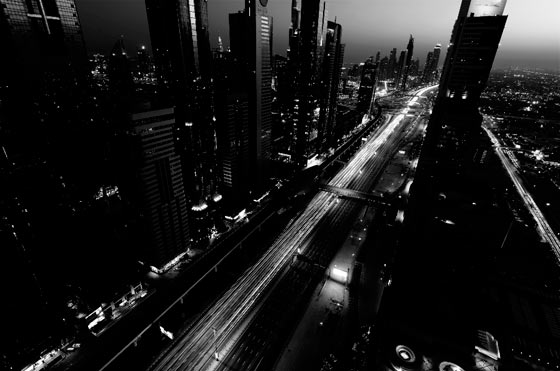
Comparing the new masks and classic masks
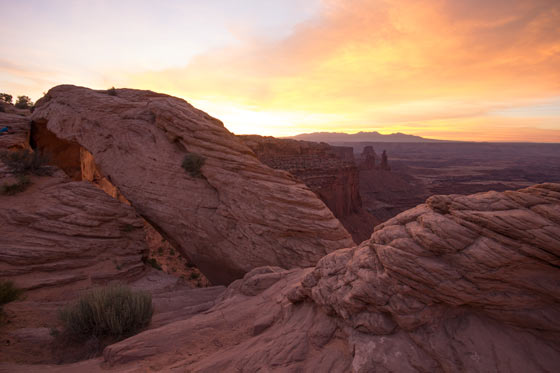
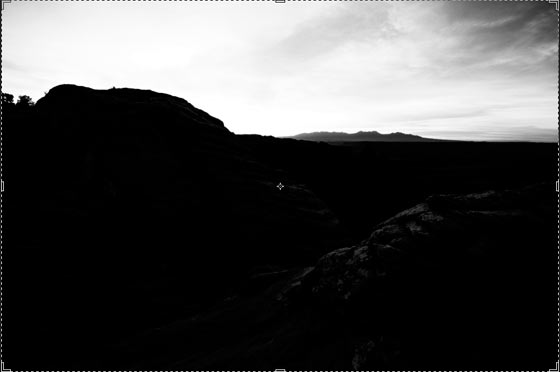
With the image below, you can see that the sky isn’t completely blown out, so separating the sky from the arch was a little bit tricky with the classic masks (which you can see on the right in the slider). But in the new masks, as seen on the left image in the slider, much of the sky has been made available, while the foreground is significantly darker, thus removing it from the selection. In one sentence, the new masks offered a much cleaner selection than the classic luminosity masks.
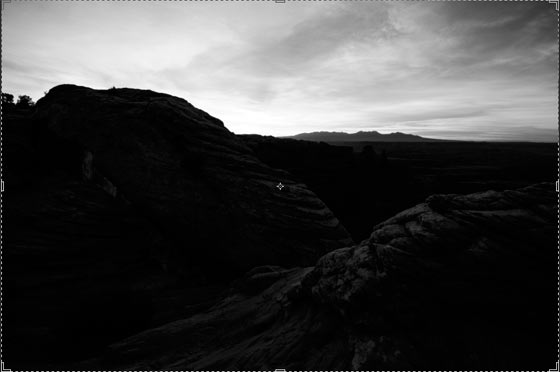
We can see the same situation with the image below. I wanted to select the sky, mainly to the top-right. In the classic masks, a clean selection of this, without including too much of the building wasn’t possible. In the end, the best I could manage from a single mask was a dull selection of the sky. With the new masks, however, the selection is much cleaner, and well defined.

________________________________________________________
How I Created The Image – Before/After Post-Processing
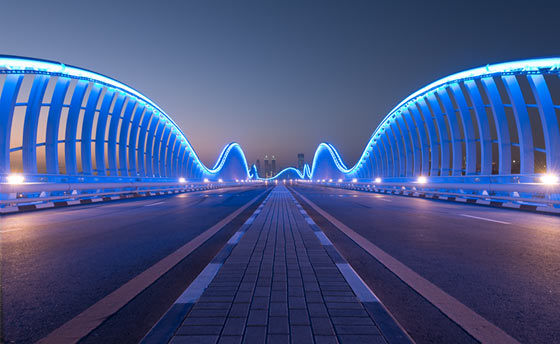
The Cool Bits – Technical Info
Processing Time: 15 minutes
Exposure Blending method: Luminosity Masks
No. of Exposures: 2
EV Range: -1 & +1
Aperture: f/8
ISO: 100
Focal Length: 23mm
Lens: Nikkor 14-24mm f/2.8
Camera: Nikon D800
Plugins: Nik Color Efex for Pro Contrast
Luminosity Masks: Brights 3 to restore highlights
Workflow Explanation – Meydan Bridge, Dubai
Would you like to learn my post-processing techniques? Feel free to check out my course: The Art of Digital Blending & The Art of Cityscape Photography
This was a straightforward image to process. I blended the two exposures using a Brights 3 luminosity mask. Using an exposure 2-stops darker, this restored the blue lights of the bridge, and a little bit of the very bright lights on the side of the road.
I added local contrast throughout to the road only, with Nik Color Efex Pro Contrast. The blue/purple colour cast was too strong on the road, so I desaturated it with a Hue/Saturation layer.
A Vibrance layer was used to brighten up the blues and pink in the sky. I finished with a vignette, created with the Elliptical Marquee tool, and that was it!

Share this:

This entry was posted on Monday, April 27th, 2015 at 4:35 pm
You can follow any responses to this entry through the RSS 2.0 feed.
Love the clarity and the colors in this image. Kudos! I notice a slight affection to NIKs Pro contrast Filter in your last workflows… 😉 Love it too! 😉
That Pro Contrast filter is a beauty 😀
Hi Jimmy! Your new masks seems to be mainly more contrasted than the classical masks. As I run PS CS 6 do you think I’ll be able to achieve similar result by applying a S curve on a classic mask itself to make it more contrasted?
Hello Jimmy – I wonder what your thoughts are on the new HDR process in Lightroom CC – It seems to do a very good and natural job to me.
I know the question is directed to Jimmy but I would like to get into the discussion.
I think Lightroom’s HDR is very very bad. Check out this review. I agree with it 100%: http://www.stuckincustoms.com/2015/04/23/lightroom-6-and-hdr-wtfadobehdr/
Don’t trust a word Trey says, he has long been associated with Photomatix. I’ve tested the functionality in LR6 and it fast and produces natural results. Photomatix takes longer because if you looking for natural results it takes a lot of tweaking. If you looking for the garish ‘I think I’m arty’ look then stick with Photomatix.
I don’t take anything Trey says for granted but it happened that I agreed with him specifically on this review. I did conduct tests myself using ACR and did not like the results. They seemed like if they were created from one single exposure. There was not much DR gain and the shadows had too much noise.
As for comparison to Photomatix, I don’t care which one is faster I enjoy photo processing and really take my time; I’m after quality. However, I think since ver. 5, Photomatix gained a new mode that results in almost natural results.
Anyway, I will continue to use LMs along with different masking tecniques and other tricks that I learned from using Photoshop for many years.
I’m acquainted with Trey and we talked recently about the 32 bit workflow, etc., It’s still in the early stages and Trey doesn’t yet see a need for it in his workflow, and I understand that. But what Adobe is doing in LR and ACR is getting them ready gradually, for the accelerated move to 32 bit processing that’s going to be the norm in probably another two or three years, of not sooner. It was only a few years ago that most plug-ins still worked only in 8 bits. Now nearly everything is 16 bits and a few plugins and about half the adjustment tools in PS are coming out to work in 32 bit mode. What you will see at the pixel level with 32bit processing is less noise, more detail, and wider dynamic range with more increments available in contrast and luminosity, which means, eventually, better control in moving tones with less artifacting.
Hi there, I’m afraid I haven’t had a chance to try out the new HDR function, but I’ve heard that if it’s used conservatively, it can create very natural results.
Thank you!!
apart from the semi-religious fervor sometimes detected among HDR people, the LRCC processing is simply there to save a step some photographers use to create a 32 bit master by sending a bracket of photos to Photoshop to Merge in HDR. It’s a flat looking file and may be a little confusing to folks who 1) have never used the Photoshop Merge to HDR to create a 32 bit negative sans tone mapping and 2) notice the result looks similar to what the main exposure might look like with shadows and highlights adjusted. However, the main difference is in three aspects: 1) a 32 bit file has, assuming the scene actually needed bracketing to get the fully dynamic range captured on a digital sensor, about 10 stops of available detail vs around 5 in a typical RAW file, 2) the merged copy will be noticably cleaner if there is any noise in the original underexposed brackets and 3) the merged file is noticeably sharper than any of the originals.
Where it breaks down is in dealing with any movement as dedicated HDR software generally has more and better controls over ghosting, etc., Also, if there is a goal to do localized tone mapping, Lightroom is not the way to go and the Photoshop and/or dedicated tone mapping software will get better and faster results.
Great tutorials, bought your courses and improved my Photoshop and Luminosity masks, very clear and concise.
That’s fantastic to hear! Thank you!!!!
hey, jimmy, thanks very much for the new action, i installed it, but once i click the run button, a window pops up and says”command duplicate not found”. i’m using cc 2014 for mac. is there some problem with the action?
Hey Jimmy! How do I add these new masks to my easy panel?