Castle Stalker
No-Man’s-Lands Journal Day 20 (Travel Diary Day 286)
With the exception of a wee bit of real estate photography last week, I haven’t picked up my camera in weeks. I miss it. It’s the only piece of machinery that I feel affectionate towards that I have yet to name.
Just looking at the incredible South American landscapes has my feet itching. This time next week we’ll be in Buenos Aires. I keep telling myself that.
The Cool Bits – Technical Info
Processing Time: 1 hour 45 minutes
Processing method: Photoshop with Luminance Masks
No. of Exposures: 2
EV Range: 0 +2
Aperture: f/13
ISO: 100
Focal Length: 40mm
Lens: Canon 17-55mm f/2.8
Camera: Canon 60d
Plugins: Nik Color Efex for Contrast adjustments, detail enhancement and shift in lighting.
Luminance Masks: Used in exposure blending and contrast adjustments
Photomatix settings: N/A
Join Me on Facebook or Google+
![]()
![]()
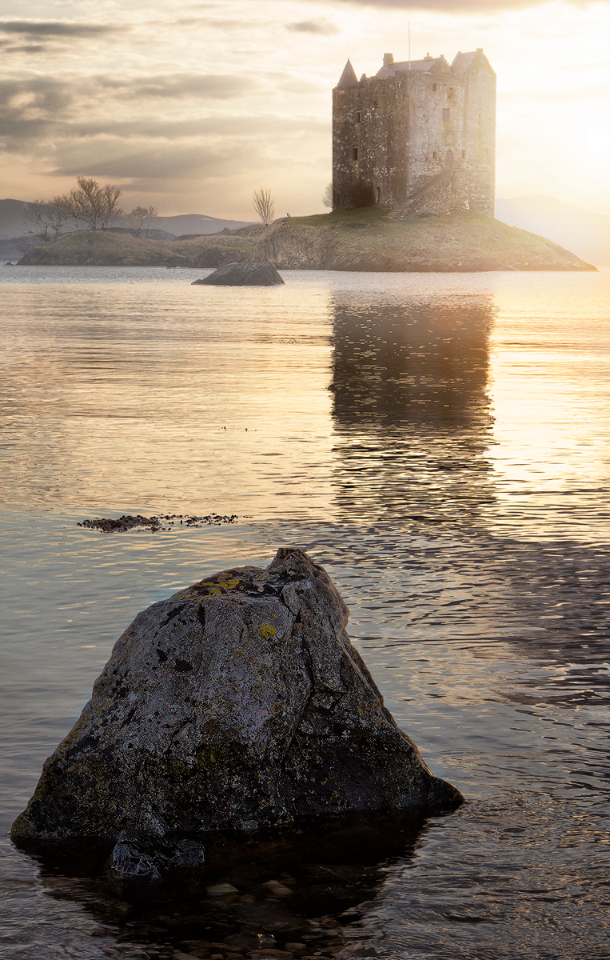
Today’s Photo – Castle Stalker, Scotland
It took 45 minutes to choose this composition. Although an interesting subject, Castle Stalker sits at an awkward distance from shore, with very little in terms of foreground elements. In terms of processing, I had only one thing in mind – balanced surrealism. But I was intent on maintaining as much sharpness in the image, especially in the rock, as possible. That’s why I chose to manually blend the images.
Tip of the Day – Luminance Masks Contrast Adjustments
For this image, I masked in the medium exposure to brighten up the darker areas, particularly on the rock and castle using a combination of Darks 2 and Darks 5 (see my digital blending tutorial). However, the medium exposure was lacking in contrast and a touch too bright. The simplest way to overcome that is to create a curves adjustment layer as soon as you have finished masking without de-selecting the original Darks 2 and Darks 5 selection. That way your adjustments will only affect the masked areas.
If, however, you want to be more specific, you can right click on the mask you’ve already created in the blending process and choose ‘Add to Selection’. Then if you create a Curves adjustment layer, it will use the exact selection taken from the original mask. This is extremely useful because we often don’t want to mask everything from our original selection directly from the luminance masks.
You can now download my 18 point luminance mask actions for Photoshop completely free – [wpdm_file id=1]
Available Tutorials:
Before the Joys of Post-Processing

Share this:

This entry was posted on Thursday, April 25th, 2013 at 12:02 pm
You can follow any responses to this entry through the RSS 2.0 feed.
Jimmy — This isn’t so much about this post, although I enjoyed it, as I do all of your travel writing. But rather wanted to let you know that I just finished your beginning HDR tutorial and came to this conclusion: Oh how I wish I had all the money back that I’ve spent over the years on various tutorials and ebooks. Instead I simply should have bought your course and used all the rest of that money for a couple of new lenses or a good vacation. Yours was simply the best. The number of new techniques and ideas I got from your tutorial is too long to list. Your style is easy to follow and your knowledge is deep. Seems to me if you ever decide you’ve had enough life on the road, there should be a teaching job waiting for you somewhere. Can’t wait to dive into the advanced course.
Denny, thanks for the amazing comment! Your compliment has put a huge smile on my face. Thanks you for taking the time to let me know and I hope you find the advanced course equally rewarding.
All the best
Jimmy