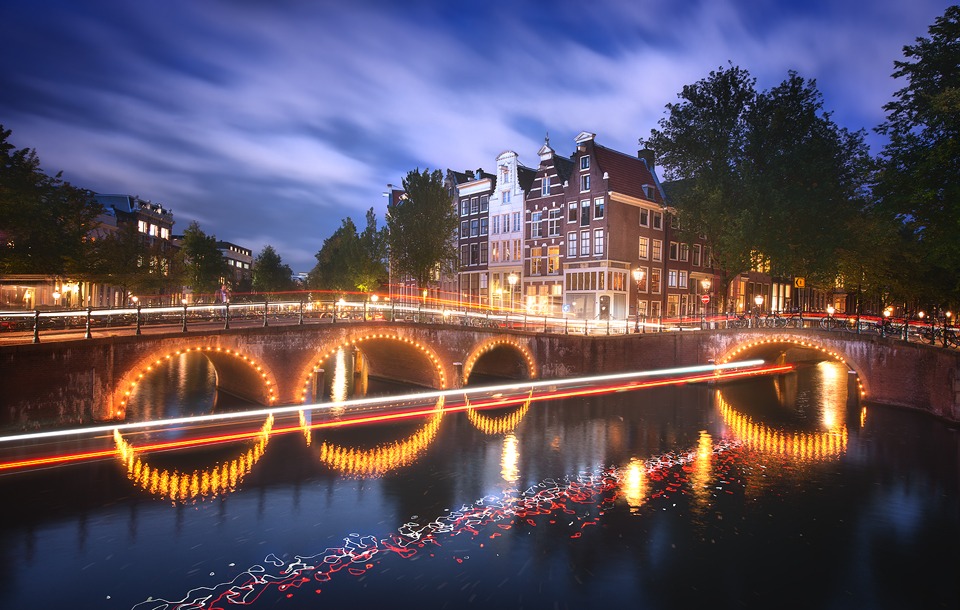
Bright Lights of Amsterdam
The Sale Has Ended!
If you’re new to the 5DayDeal, every year photographers and software companies put their best courses, software and presets together, to create an unbelievable deal.
And so far this has raised almost $500,000 for charity!
In short, you can get more than $2,500 worth of superb photography resources for just $97!
And…
If you purchase the 5DayDeal through the link in this post (see below), or the link I shared on Facebook, I will give you Raya Pro, or any other single product for free (see below for how to claim your free product).
And this year I have already contributed the Art of Cityscapes, and the Photoshop and Lightroom Presets/Action pack which is not available anywhere else.
My Link for the 5DayDeal: https://5daydeal.com/ref/JimmyMcIntyre/

*In order to get Raya Pro, or any other single product for free, you must:
- Purchase the 5DayDeal from my link. This will not work if you purchase using the link of anyone else.
- Reply to this email, giving me the email address you used to purhcase the deal so I can verify the purchase, and tell me which product you want for free.
- That’s it! I will then send you the product.
Conditions:
Please note, this only includes individual products. Bundles are not included. For example, you may have Raya Pro OR the Mastering Raya Pro course, but not both together. This is the same for any other bundled deal I offer.
________________________________________________________
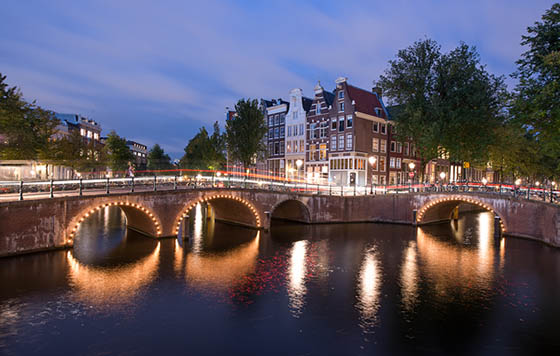
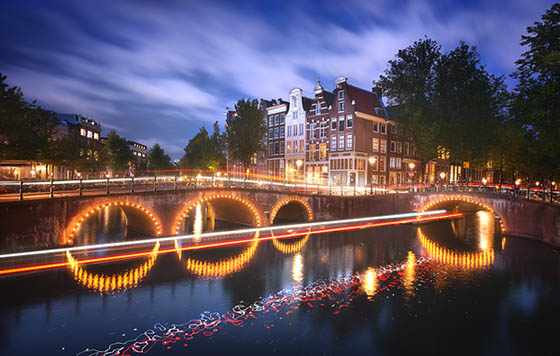
How I Created The Image – Before/After Post-Processing
The Cool Bits -Technical Info
Processing Time: 45 minutes
Exposure Blending method: Apply Image in Raya Pro
No. of Exposures: 4
EV Range: 0, +2
Aperture: f/8
ISO: 100-400
Focal Length: 21mm
Lens: Nikon 14-24 f/2.8
Camera: Nikon D800
Plugins: Topaz Denoise
Luminosity Masks: N/A
Edited on: Surface Pro 4, Intel i7, 16GB RAM, 512SSD
Workflow Explanation – Bright Lights of Amsterdam
This image was created using Raya Pro – The Photoshop Plugin.
This image is made up of 4 exposures. The first image is the base exposure which was used for about 50% of the scene. A second image, shot about 20 minutes earlier, was used for the water because the textures were nice and smooth. A third image was used to recover the sky and add more emphasis to the clouds. This was also used for initially bringing back any over exposed areas. And finally, one more exposure was used to add the boat light trail in the water.
I recovered the over exposed highlights from a darker exposure using Apply Image in Raya Pro. For the water, I just masked by hand that area into the base exposure. And for the light trail, I layered this exposure on top and changed the Blend Mode to Lighten.
As you can see in the before image, some of the lights on the bridge to the left weren’t working. I copied the lights on the far left, transformed, distorted and masked them so they fit naturally to the area missing the lights.
I also added darker blue tones to the water. Since this exposure was shot earlier in the blue hour, the water was more cyan than blue, so it needed to match up more with the colour of the sky.
To increase local contrast, especially in the sky to emphasise the clouds, I used Nik Color Efex’s Pro Contrast filter.
Although I added a tiny bit of Orton to soften the image slightly (find out how to do that here: Quick Photoshop Secrets 7: How To Create a Dreamy Orton Effect), I increased the Orton effect significantly around the bridge lights, just give them a little bit more glow and saturation.
You may have noticed that the light trails on the bridge, don’t match with the water. In other words, the reflection of the bridge in the water doesn’t contain light trails. I considered this for some time, eventually deciding to add some in. When I did so, the scene became too much, especially with the light trails that already existed in the water. So even though it may not be natural, I opted to leave the bridge light trails out of the water. I imagine not too many people would notice this.
After a few small colour and contrast adjustments, I darkened the image quite a lot, and gave the highlights a good punch.
And I finished by creating a gentle custom vignette that you can learn to do here: Quick Photoshop Secrets 9: Awesome Vignette For a Moodier Scene.
Finally, the image was sharpened and resized using my free sharpening tools, which you can download here: Quick Photoshop Secrets 16: Perfect Sharpening & Resize for the Web
As always, I hope you found this useful.
Jimmy

Share this:

This entry was posted on Monday, October 17th, 2016 at 5:59 pm
You can follow any responses to this entry through the RSS 2.0 feed.
hi, i just purchased the 5 day deal through your link, but am not sure how to send you my email address.
thanks for the great extra, cheers,
julianna
Hi there,
Thank you for the email. If you could please email the info via my contact form, I will get back to you as soon as possible.
Contact form: https://www.throughstrangelenses.com/contact/
Thank you
Jimmy
Hello Jimmy, I also bought the 5daydeal package via your link and I like to receive the Raya Pro Plugin.. I already sent you a mail via your contact form last week.. As I did not get any answer yet, I wanted to ask if you received my mail.. thank you! greetings stefan
Hi Stefan,
It seems your email did not get to us. Apologies for that. Please could you try contacting us through: http://www.shutterevolve.com/contact/
Thank you kindly!
Jimmy
Hello Jimmy,
thank you for the fast answer here! I guessed that something must have gone wrong in the first run.. Just sent you the info via shutterevolve contact form again..
thx!
stefan
Hi Jimmy, I really like the image, the whole feel of it. its easily recognisable as an Amsterdam scene. Now that autumn has set in and the yellow leaves are drifting down into the canals, its an exciting time to see Amsterdam. Ive read your ‘how to’ of this image and i’m wondering whether you could include this image in one of your upcoming tutorials? kind regards Bram