Sunrise in Guilin – Floating On Fog
Sunrise on fog in Guilin
An hour after touching down in Guilin airport, we were hiking up our first location, Cuiping.
 Although the hike wasn’t the most difficult, or longest, the heat and humidity seemed to add a few kilos to my bag. The muddy, narrow path eventually led us to stunning views across valley, surrounded by unique, cone-shaped hills.
The clouds were light and fluffy, almost promising an interesting sunset. We had an hour to go. As we debated the chances of a dramatic golden hour, the clouds began to shift in a sinister way.
Within 15 minutes our conversation had changed from the potential of a beautiful sunset, to whether or not it would be safe for us to remain on the cliff edge should the weather turn bad – and bad it did turn.
10 minutes later lightning hit, followed shortly by the distant echoes of thunder. We packed up and left when the rain worsened.
As we clambered down the hill, the heavens opened up. All of a sudden the muddy trail became a veritable stream, flowing around our ankles. We were stuck between getting down to safety as quickly as possible, and going slowly enough to keep our footing.
The lightning became more frequent, cracking down every few seconds, with the thunder catching up each time.
Soon, the lightning had overtaken us and now smashed down over the hill in front of us. We were greeted with a rumble of thunder that you feel in your bones.
When we finally descended safely, our driver wasn’t there. He’d gone to get food.
We took shelter under the roof of a small house, one of only a dozen or so in this tiny farming village. The family inside took pity on the drenched foreigners and invited us in for peanuts.
The two daughters, about 3 and 7 years old, were very curious about their new visitors. Their brother, about 4 years old, wandered into the kitchen with no clothes on, to see what the fuss was about. He seemed unimpressed, broke wind loudly, and walked back into the other room.
Just then, in the midst of this monumental downpour, lightning struck only a couple of hundred metres away and took the power with it. The locals barely noticed we were now in relative darkness.
The driver finally returned. We thanked our kind guests and headed to our hotel, somewhere in the distant hills.
Electricity was out everywhere. Our hotel was in complete darkness apart from light offered by some well-used lanterns.
We got some hot food, and retired early, ready for a sunrise shoot. The storm was still howling as I lay in bed, with lightning illuminating my room every few seconds. I lay there wondering if we’d be rained out for our 4 days in Guilin. It was very possible. Would we come away without a single image? Our guide, Greg, said the weather was simply too unpredictable to know.
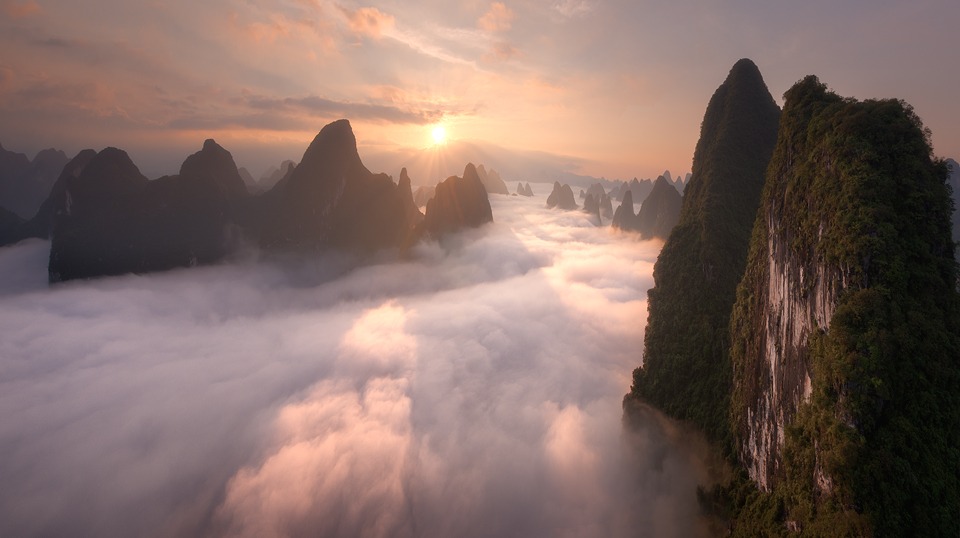
The next day, at sunrise, we were greeted with the most magnificent scene, with rolling, thick fog covering the valley below, showing only the tops of these beautiful hills – a once in a lifetime experience, according to locals, which wouldn’t have been possible without the storm. I made a note to thank the weather gods later.
________________________________________________________
How I Created The Image – Before/After Post-Processing
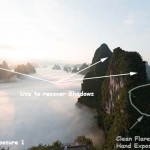
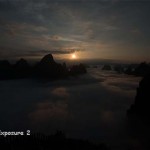
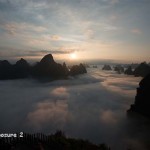
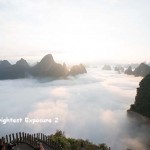
Original files

The Cool Bits – Technical Info
Processing Time: 45 minutes
Exposure Blending method: Apply Image and Rapid Blend If in Raya Pro
No. of Exposures: 7
EV Range: -2, 0, +2
Aperture: f/16
ISO: 100
Focal Length: 14mm
Lens: Nikon 14-24mm f/2.8
Camera: Nikon D800
Plugins: Nik Color Efex Darken/Lighten Center
Luminosity Masks: N/A
Workflow Explanation – Guilin Sunrise
This image was created using Raya Pro – The Photoshop Plugin.
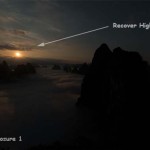
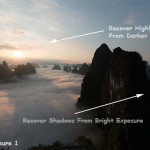
This image is a 2-tile panorama, stitched in Photoshop. Each tile consisted of 3 exposures. One tile also had an extra exposure to reduce flare from the sun.
Blending the exposures was very quick in Raya Pro. To blend the darker exposures into the base exposures, I made the darker exposures invisible, and pressed the Apply Image Dark1 button, and then lowered the opacity of the dark layers until the blend was natural.
To blend the brighter exposures, I placed them at the top of the layers in the Layers panel, and just used the Rapid Blend If ‘Bright’ button function, again lowering the opacity of this layer until it looked natural.
Before the blending, however, I achieved the pink/magenta colour by moving the Tint slider in Adobe Camera RAW to the right, and doing the same with the Temperature slider slightly.
I blended each tile separately before stitching the pano. Once blended, I was left with two tiles that had nicely controlled shadows and highlights.
Photoshop, however, had no interest in stitching these tiles together. The images were shot at 14mm and there was simply too much difference between them to make a clean blend. I didn’t have a chance to download any pano software before leaving, and the internet in China was too slow.
Instead, I manually transformed the images with a mixture of Free Transform, Distort and Warp until they virtually slotted in next to each other. Finally, after some convincing, Photoshop gave in and stitched the pano for me.
From there, I still had more transforming to do. The mountains to the left were far too small in relation to the ones on the right – which also left a lot of dead space in the sky in the top left. Using Distort and Warp I pulled these mountains up slightly, keeping them natural looking at the same time.
I then created various contrast adjustments to enhance the midtones and highlights, each time using the Apply to Shadows/Highlights function in Raya Pro to target each area specifically. To protect the shadows I used the ‘Shadows’ function in Raya Pro.
I brightened up the face of the mountain to the right by dodging it with DB2.
I then added a touch of Orton Effect, using the OE2 option, just to soften the image slightly. Finally, in Nik Color Efex, I used the Darken/Lighten filter to shift the balance of light toward the sun, while adding a gentle, and natural vignette to the image.
I finished by sharpening and resizing in Raya Pro.
I hope you enjoy the image!

Share this:

This entry was posted on Monday, August 24th, 2015 at 12:35 am
You can follow any responses to this entry through the RSS 2.0 feed.
The best teacher on blending there is! The “MASTERCLASS” has changed my workflow and LIFE in photography forever! AWESOME
Thank you very much for the awesome comment Brian. Really glad to hear it 😀
Stunning shots. I have stopped using HDRefex since I bought your pro panel. Makes blending a doddle.
That’s fantastic news Bobby! Thank you!
I have to admit the Raya Pro Panel is so easy to use but I still have some difficulty understanding how to use luminosity masks. I’ve been using Photomatix to create 32-bit files for over a year and making the transition is hard but I am determined to get it at some point. I have purchased all of your tutorials so I know I need to watch them more than once 😉
Great to hear you’re determined. Like any good thing, Luminosity Masks take a little bit of time to master. But once you’re there, you’ll have an invaluable post-processing skill 😀