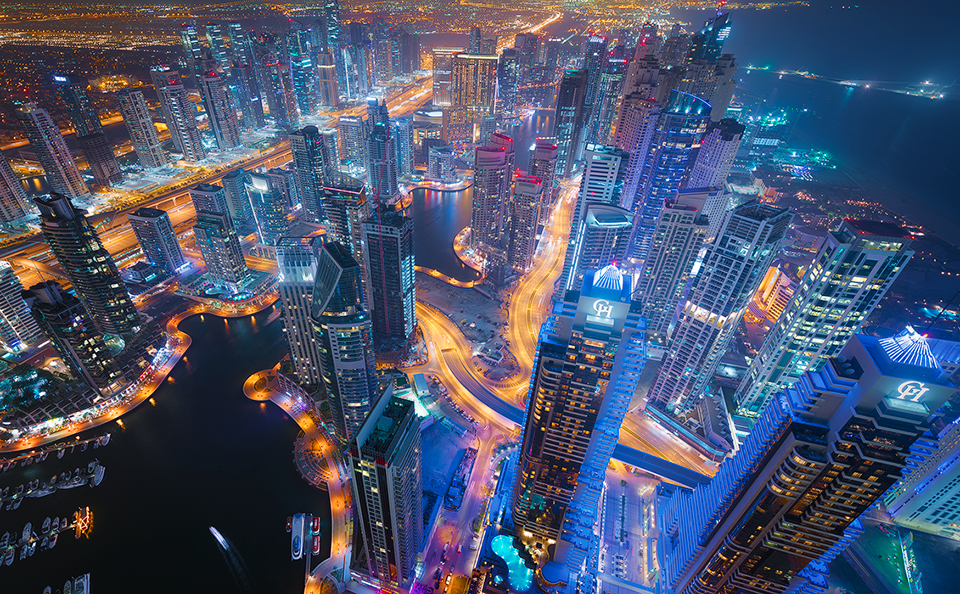
Bright Lights of Dubai Skyline
A Life Almost Without Internet Communication
One of the wonderful things about social networks, like Facebook, is that we now have the ability to instantly connect with someone across the globe, who we may never have otherwise met.
I feel very fortunate to be connected with many photographers online, some of whom I’ve met in real life and developed an actual friendship. And on my news feed I’m exposed to beautiful images from exciting locations.
However, although social media can connect us to anyone online, it has a unique, and rather worrying way of disconnecting us from our physical world – from the here and now.
In Restaurants in Korea it is very common to see families staring at their tablets and phones, rather than meaningfully connecting with each other. Down by the riverside, I see people walking along, scrolling endlessly down their news feeds, oblivious to the beautiful blue sky and energy around them. I, too, have caught myself on multiple occasions checking my emails or Facebook at the expense of enjoying this moment, right here.
For 5 years I lived without a mobile phone. Believe it or not, it didn’t impede my life in anyway. It was actually quite liberating. Recently, however, my wife asked me to get a smart phone so that we could chat conveniently when I was travelling. I agreed and ended up with an iPhone 6. I loved the little gadgets and apps available, and before I knew it, I was hooked.
While travelling through Dubai, Malaysia and Singapore I needed my phone to keep in touch with local photographers, too, who we were due to meet. Yet, I very quickly got into the habit of checking my phone regularly, or just jumping on social media for a quick look.
It took 2 weeks before I said enough’s enough. Since then I have my phone either switched off, or in Flight Mode the vast majority of the time.
We don’t quite realise how damaging the Internet can be. Having instant information, instant entertainment, instant hits of chemical pleasure every time we get an alert, is causing us to disassociate from what’s important – real life. Even more worrying is the growing body of research from positive psychology showing the importance of attention span and concentration on mental well-being.
Did you know that the average human attention span has decreased so significantly over the years that we now have a weaker attention span than a gold fish? You can read more about it here: Attention Span.
At some point down the line we lost the ability to sit peacefully, without distraction, and just enjoy the moment. I’ve been guilty of this too, to some extent. But regular meditation has been wonderful in allowing me to stay fairly grounded in reality, and do simple things like drink a cup of tea in peace without distraction, or run in the morning with a clear mind.
That may sound boring to some, but try it. See if you can sit with a cup of tea or coffee, and just slowly enjoy the drink. No music, TV or distractions – just enjoying the relaxation and the flavours. You’ll see that it is far more challenging than it sounds. Our minds are so used to constant distractions that it is very difficult just to settle our thoughts down and enjoy the moment.
In an attempt to free myself from distractions, I have a very strict routine of checking my emails and Facebook a maximum of twice a day only. I don’t scroll down my news feed or do it to kill time. It’s purely to see if I have correspondence that needs an immediate response. My wife and I also have a no-phone policy when we’re together in a coffee shop or restaurant. On Sundays, however, I spend a little bit more time interacting online.
One of the other benefits of removing these distractions is that it frees up a significant amount of time. Many years ago my morning routine would have been to get up, open my laptop and vegetate on the Internet until it was time to go to work. Looking back now, it was such an unhealthy way to start the day.
By lunchtime today I had ran 5 miles, been to the gym, meditated for 45 minutes, and written 1,000 words for my E-Book (disclaimer: I’m not always this productive). I honestly believe that if I wasn’t strict with myself, and allowed myself to be distracted, I wouldn’t have been half as productive.
I am genuinely thankful for having the convenience of social media in my life, and the connections it has allowed me to make, but I know that, for me at least, the frequent use of such social media is not a healthy behaviour. I’m much happier being plugged into this moment, interacting in the real world, all senses firing, than vegetating in cyber space.
________________________________________________________
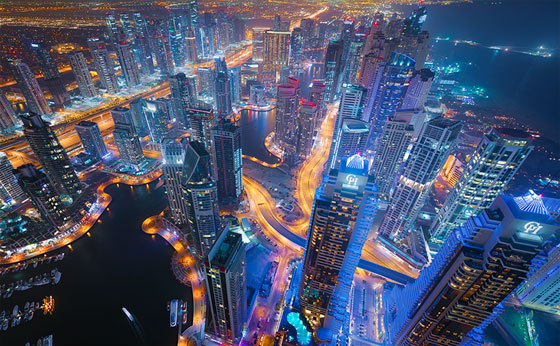
How I Created The Image – Before/After Post-Processing
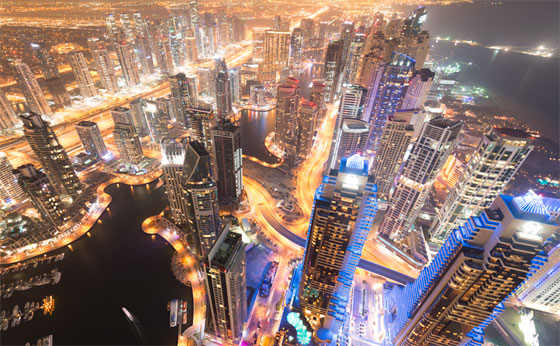
Original exposure before crop
The Cool Bits – Technical Info
Processing Time: 30 minutes
Exposure Blending method: Luminosity Masks
No. of Exposures: 3
EV Range: 0, -2, -3
Aperture: f/2.8
ISO: 100
Focal Length: 14mm
Lens: Nikkor 14-24mm f/2.8
Camera: Nikon D800
Plugins: N/A
Luminosity Masks: Brights 3 & 4 to restore highlights
Workflow Explanation – Bright Lights of Dubai
Would you like to learn my post-processing techniques? Feel free to check out my course: The Art of Digital Blending & The Art of Cityscape Photography
I’d like to extend a very big thank you to Dany Eid and Daniel Cheong for taking us to this great location, on Cayan Tower, in Dubai. It was nice to meet two great photographers in front of such an awesome view.
In terms of post-processing, this image went through various changes until I was happy. Initially I created a vertorama, which included the sky I shot at sunset, and the full, un-cropped image you see above. While the image was pleasant, I felt that the buildings looked too far away for them to have any impact.
I tried various crops and finally settled on this one, which I think has more immediate impact than the original composition.
In Adobe Camera RAW I made only a couple of adjustments. I moved the Temperature slider to the left, for a colder scene. I almost always prefer a blue, cooler night time cityscape to a warmer temperature. Then, in my darkest exposure (-3 ev), I lowered the Highlights until all of the highlights were fully recovered. Some were a tiny bit blown out beforehand.
 The biggest challenge of this image was rendering it in a way that wasn’t too intense. By that I mean that all of the brightly lit buildings made for a scene where there was simply too much going on. I had to, therefore, restore the over-exposed areas using the two darker exposures. But even then the scene would still be dominated by lights that were all competing with each other for attention. So my next task was to lower all but a few highlights, and concentrate the eye on a key area in the image. Here’s how I did it:
In Photoshop I layered the 3 exposures, with the base exposure on the bottom. I placed a black mask on the other two darker exposures. Using the Brights Luminosity Masks on my Easy Panel, I selected Brights 3 initially. At 100% opacity, I painted in the -2 exposure, to partially restore the over-exposed highlights. Then, with a more precise Brights 4 selection, I painted in the darkest exposure (-3 ev) at around 50% opacity. I wasn’t making large brush strokes across the image. Rather, I was zooming in and gently restoring the over-exposed areas.
After I was happy with the highlights-recovery, I then had to ‘soften’ the highlights further, and darken the midtones in general. To do this, I opened up a Levels adjustment layer, and moved the midtones slider (the middle arrow) to the right to darken the image. This also darkened some of the shadows too much, so underneath this main slider we can see another slider with a black to white gradient.
I slid the left arrow slightly to the right, until the first box in the Output Levels underneath had a number 10. Essentially, this is raising what you want to consider the black point in your images. It’s a very good way of protecting shadows.
To dim the highlights across the image I went to the opposite slider, on the white side of the gradient and slid it left a touch, until the Output Level below it went from 255 to 245.
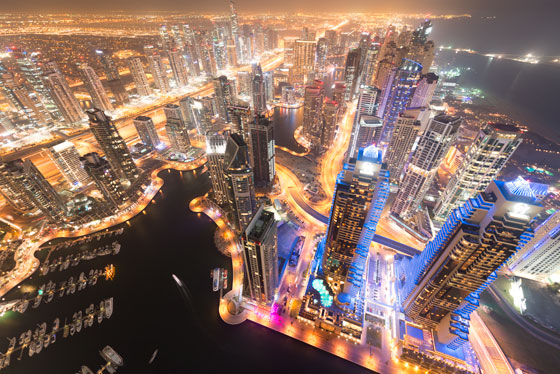
Next I wanted to brighten up the central part of the image, and the foreground with the two interesting towers. I did this using the same techniques I used in the Autumn Bamboo forest image to create a soft, dreamy feel. I created a New Layer, and made a large, soft white paint brush. at 100% opacity I painted a large white circle in the areas I wished to brighten up. Then I changed the Blend Mode of this new layer to Soft Light and reduced the opacity until this area had a gentle glow coming from it.
To finish I added a soft vignette by using the Elliptical Marque tool and a Curves layer.

Share this:

This entry was posted on Monday, April 13th, 2015 at 3:37 pm
You can follow any responses to this entry through the RSS 2.0 feed.
Jimmy, agree with this completely. This is kind of an addiction.
I think the before and after images are reversed?
Thank you for this great article! I guess you mixed the before- and after-image in the slider? 😉
Thanks for letting me know 😀
You’re welcome. 😉 If I may ask something regarding your Easy Panel: Will there be an update of any kind to support other language versions of photoshop? I can’t use most of your actions in my german photoshop cc… 🙁
I wish that was an option Sascha, but right now, because of the cost to develop the EP, it isn’t possible. However, all of the actions that are included can be translated into German. In one of the PDFs I include a link to site that will translate the actions for you. I hope that helps!
I see. I will try it, thank you for your quick response! Look forward to read more from you. 😉 Keep up the awesome work!
Hey Jimmy, in case you want to be able to quickly deliver a working version of your actions to german users, here’s an action-folder containing your actions, which I translated to german. Feel free to copy the atn-File for sharing.
http://www.mediafire.com/download/s9dwh0qjdye8my2/Jimmy_McIntyre.atn
Thank you very much! I’m sure my German followers will be thrilled by this!!!!
Hi Jimmy, very glad I read your articles and tutorials. I always look forward to each new article and experiences with which you can do to share. But I also have a problem with EASY PANEL. In the Czech version of Photoshop CS6 it does not work as it should, which I am very sorry …
I wish every success; -…
Hi Jimmy, spectacular as always and very informative. Quick question, wha program do you use for these before and after sliders? Pretty slick!
Worry not, I just saw someone asking you the same question!
Hi Jimmy, make Quotes and would love to use this photo, would you mind? I’ll link it to this blog too, of course.