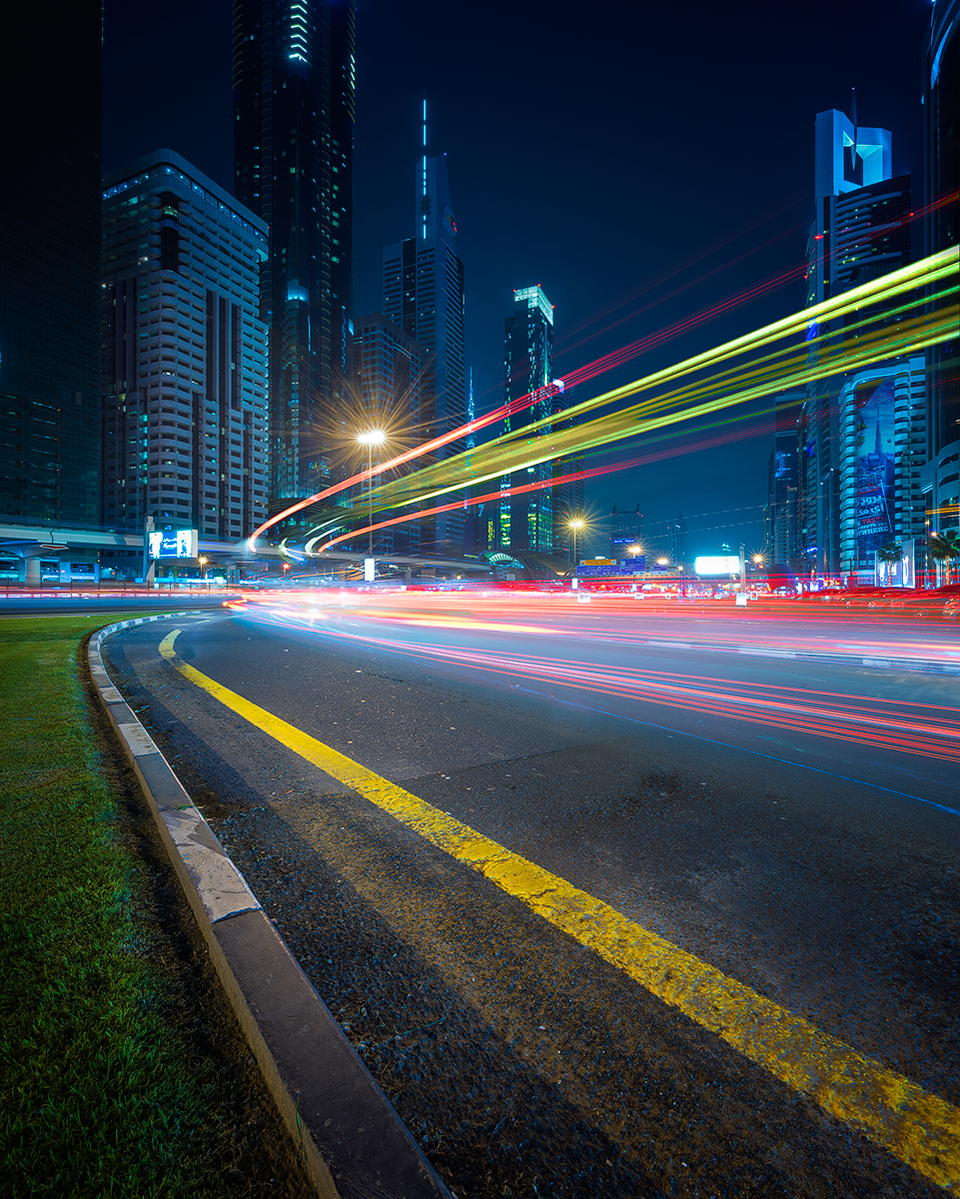
The Flash
Korean Food Pleasures

Silkworm
Having spent a lot of time in Asia, I’ve had the great fortune of sampling some very tasty, and not so tasty foods. In Thailand, for example, I had crocodile steak, which was very nice and tender.
In Korea, I’ve developed a taste for some less likely foods. The strangest of which, according to my wife, is Beondegi, or in English, Silkworm. I don’t know many foreigners who enjoy them, but they’re one of my favourite snacks. I love to munch on their little legs and shells.
While Beondegi is more of an occasional treat, I regularly enjoy a bowl of fresh seaweed with a touch of balsamic vinegar mixed in for luck. Again, Rachel isn’t happy about the ‘seaside smell’ in our fridge, and doesn’t understand why I like it, but it reminds me of the mussels I used to get at home, and because seaweed is green, I’ve decided that it must be healthy for me.
I also quite enjoy chicken butt. It’s chewy, and particularly enjoyable after a few drinks.
I haven’t eaten live squid yet. Whenever I see the tentacles moving around frantically I just imagine them strangling me from the inside.
I’ve avoided eating dog, and will continue to avoid it, unless I’m stranded on an island of dogs with no other food to eat.
When looking at it from an outsider’s perspective, we eat some strange things in the British Isles too. Whoever thought of shoving a sheep’s heart, liver and lungs into its own stomach and eating it (haggis), was either very creative, or very disturbed. And black pudding, otherwise known as pig’s blood, doesn’t sound too appetizing, unless you’re a vampire with a conscience. Nevertheless, I love them both, and I’m looking forward to sampling them once more next year.
________________________________________________________
How I Created The Image – Before/After Post-Processing
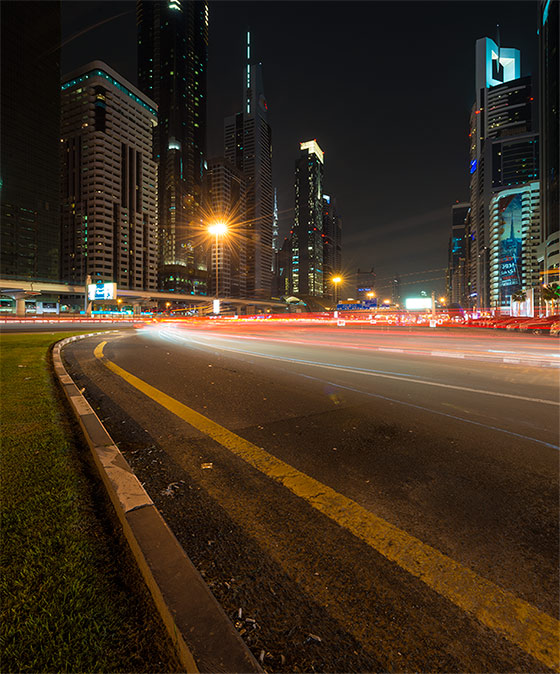

The two original exposures before cropping
The Cool Bits – Technical Info
Processing Time: 45 minutes
Exposure Blending method: Luminosity Masks
No. of Exposures: 2
EV Range: -1, 0
Aperture: f/16
ISO: 100
Focal Length: 14mm
Lens: Nikkor 14-24mm f/2.8
Camera: Nikon D800
Plugins: Nik Color Efex
Luminosity Masks: Brights 3 to control some highlights
Workflow Explanation – The Flash
Would you like to learn my post-processing techniques? Feel free to check out my course: The Art of Digital Blending & The Art of Cityscape Photography
This was one of the longest post-processing workflows I’ve done in a while. Most of the time was taken up cleaning the image. As you can see in the before image, there was a lot of litter/cigarette buds on the road and grass. I used the clone stamp to get rid of this.
The second, equally time-consuming task, was cleaning the many points of lens flare that were created from both the main street light in the centre of the image, and the lights from passing cars. With shorter exposures (this was a 20-second exposure), and when there’s one main source of lens flare, I use this technique to come out with clean images: How To Avoid Lens Flare In Your Images.
With this shot I used a combination of the Patch tool, and Clone stamp to clear away most of the flare.
To begin with, before I cleaned the image as mentioned above, I edited the two exposures in ACR. I wanted to create a very colourful scene, with a few strong primary colours. I knew that the sky I’d originally captured wouldn’t compliment the green/yellow/red light trails in the sky, so I slid the Temperature slider almost completely to the left, which gave the image a strong blue cast. This also gave the road a cooler tone, which helped the painted yellow line stand out. This was extremely important, compositionally, as I wanted to emphasize the almost-symmetrical shapes of this line and the strong green/yellow light trails above. I then increased the Clarity slider to around +20 to add a little local contrast throughout the image.
 After editing in ACR, it wasn’t a simple case of blending the exposures in Photoshop. I had to double process the darker exposure first. In other words, I had to process the darker exposure twice in ACR so that this image could serve two functions. If you’re new to Double Processing, I highly recommend this tutorial: How To Double Process A Single RAW File
The first function I needed this image for was the awesome light trails in it. The second function was to control some of the highlights, especially the main street lamp. The problem here is that these two functions contradict one another. In order to use the awesome light trails, the highlights needed to bright (+50 in ACR). But to use this same exposure to control the over-blown highlights in the base exposure, I needed to lower the highlights (-35 in ACR).
So to get around this, it was actually very simple. Before pressing ‘Open Images’ in ACR, I instead held down Shift, and ‘Open Images’ became ‘Open Objects’. After I clicked on this, my images in Photoshop were opened as Smart Objects, which means, in this context, that if I wanted to, I could double-click on the image thumbnail and re-open ACR to regain access to the RAW file, and the initial changes I made in ACR.
With my images as Smart Objects, and layered in Photoshop, I duplicated the darker exposure. Currently, the dark exposure had bright highlights which emphasised the light trails. I right-clicked on the new duplicated layer and chose ‘Rasterize Layer’. This made the duplicate exposure a normal layer (not a Smart Object). I then double-clicked on the darker exposure which was still a Smart Object, went back into ACR, and lowered the Highlights. Then I clicked OK. I now had 3 layers; the base exposure; a darker exposure with bright highlights for the light trails; and another darker exposure, this time with darker highlights.
Now to the blending…
Firstly I created Brights Luminosity Masks with the Free Easy Panel. I then added a black mask to the darker exposure with the darker highlights. Using a Brights 3 mask, I masked this darker exposure into the main over-exposed areas of the base image. To blend in the Light trails quickly, I used the usual Blend Mode, Lighten. If you’re new to car trails, please see: How To Add Dramatic Car Trails To Your Photos In Photoshop
With the images blended I merged them non-destructively by holding Shift+CTRL+ALT+E. This is when I began the cleaning process mentioned earlier. With that done I made a few colour adjustments. Firstly, the main light trail at the top was originally green. I wanted to give this a slightly more yellow tone so that its colour was closer to that of the line on the road.
To do this I opened a Hue/Saturation layer, chose the little hand icon in the top left of the dialogue, and clicked on the green light trails. This selected that colour range. I then moved the Hue slider left until the colour was a little bit more ‘yellowy’.
With the hand still selected, I then click on the painted yellow line, to select a yellow colour range, and increased the saturation, so that the yellow popped against the cold road. I also increased the saturation of the reds slightly.
I wanted to add a little bit more contrast to the road and yellow line so I opened Nik Color Efex, and used the Correct Contrast slider in the Pro Contrast filter. To apply this only to the road I placed a black mask on this new layer and just hand painted the contrast changes into the desired areas. In Nik Color Efex again I used the Darken/Lighten Center filter, with a heavy vignette.
To finish, I cropped the scene so that the yellow line met the corner of the image. I felt that the scene was too long and thin to make an impact. So, using the crop tool again, but rather than cropping the image, I dragged outwards, which expanded the canvas. Then I used the Transform function, Ctrl+T, and literally stretched the image, until it was wide enough to be impacting, but also still look natural.
And that was it!

Share this:

This entry was posted on Monday, April 6th, 2015 at 5:33 pm
You can follow any responses to this entry through the RSS 2.0 feed.
Black pudding – winner
Thanks for that interesting article and tutorial! one question about the easy panel: do you it might be possible to update the actions in it to language-independent photoshop versions? Because most actions in your Panel won’t work for me (german Photoshop). 🙁
I think we need more video tutorials. I don’t like to read at all.
Great composition by the way.
I completely disagree. There are hundreds of video tutorials around there, but few people take their time to write it all in detail. Both are good, but some things require seeing a video, others are better followed when written.
Anyhow, my congrats to Jimmy for such a great work he is doing teaching people. I’m one of those many photographers whose images have greatly improved since I got his courses.
Could never bring myself to try the silkworms. But your tutorials rock. Thanks Jimmy. All the best to you.
Awesome before/after! Thanks!