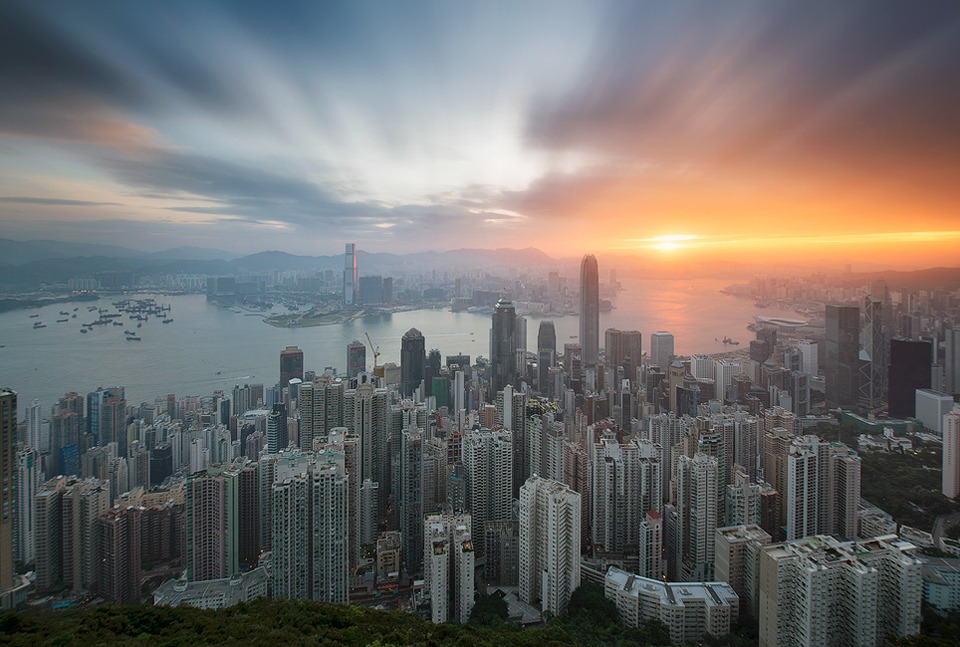
Hong Kong Sunrise – Version 2
5 Weeks of Travelling
Sunday marks the beginning of around 5 weeks on the road. The first two weeks my wife and I will be relaxing on the Philippine beaches of Boracay island. After that, however, it’s 100% photography. With 11 days in Dubai, and 11 days in Singapore and Malaysia, it is set to be a cityscape-bonanza, provided the weather is kind to us.
For the trip, I’ve added a couple of new members to my camera equipment family. I have a new d800 L-Plate and will soon be getting the Nikkor 24-70mm f/2.8, as an upgrade from my Sigma 24-70mm f/2.8.
I apologise to those enquiring about workshops in the countries I’m visiting. I won’t be able to teach this time around, but I do hope to re-visit each country for Digital Blending workshops in the near future.
For anyone considering my Art of Digital Blending course, I created a promo video for it last week, which gives an idea of what is taught in the course.
The Cool Bits – Technical Info
Processing Time: 35 minutes
Exposure Blending method: Gradient Mask
No. of Exposures: 7
EV Range: -1 (x6) for the sky & 0 base exposure
Aperture: From f/8
ISO: 100
Focal Length: 14mm
Lens: Nikkor 14-24mm f/2.8
Camera: Nikon D800
Plugins: Topaz DeNoise & Nik Color Efex
Luminosity Masks: Used to protect highlights while increasing the brightness of the midtones
Workflow Explanation – Hong Kong Sunrise 2
I had an idea in mind for a tutorial on creating a fake long-exposure in Photoshop. Since I use an ND filter, I don’t usually need to create this type of effect, which requires shooting a good number of exposures over a longish period of time of the same scene.
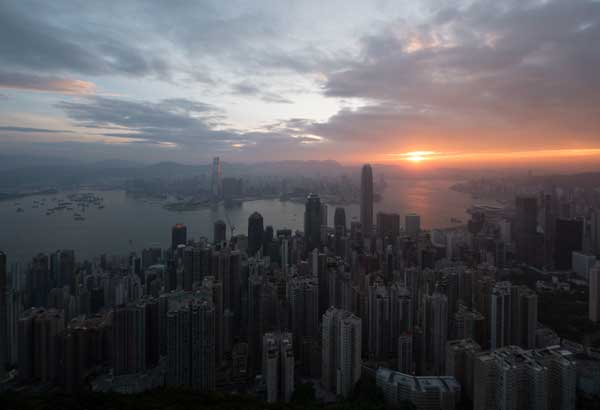
After hunting around my unused images, I came across this scene, which fit the bill perfectly. Originally I chose to go with the blue hour version of this shot which you can see here: Sunrise At Victoria Peak. It’s richer in colour and generally sharper.
This image is composed of 7 exposures; 6 for the sky and 1 brighter exposure for the foreground. I needed 6 -1 ev exposures for the sky, shot over 10 minutes, so that I could capture enough cloud movement to create this long exposure effect in Photoshop.
I’m going to create a video tutorial showing you how to do this in Photoshop, after I’ve created a tutorial demonstrating the techniques in my latest article: How To Deal With Moving Objects in Digital Blending. This is a must read for any Digital Blender!
Once I layered the sky exposures in Photoshop, converted them to Smart of Objects, and used the Mean Stack Mode to stretch out the clouds, I then used a Radial Blur to stretch them out further.
Since the foreground was too dark, I placed a brighter exposure on top of my Smart Object, and used a gradient mask to quickly and easily blend the exposures. You can see a tutorial on Gradient Masking here: Sky Replacement Tutorial in Photoshop – Gradient Mask.
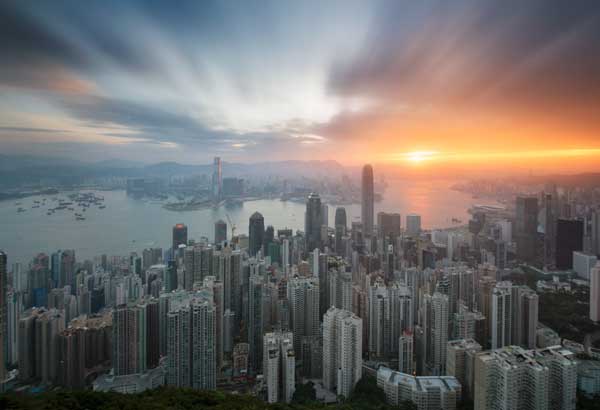
To get the soft sunrise effect, I used the Glamour Glow filter in Nik Color Efex Pro. I chose some extreme settings, and then masked this filter into the sunset part of the sky only. I then added extra warmth around the sun. You can learn how to do this here: How To Add Warmth To a Sunset or Sunrise.
After some basic contrast adjustments to the midtones in the image to brighten them up, I finished the image with a circular vignette to the sky.
Before/After post-processing

Share this:

This entry was posted on Tuesday, January 13th, 2015 at 3:44 pm
You can follow any responses to this entry through the RSS 2.0 feed.
Nice article! This is something I’d like to do and you’ve given me a new way to think about how to do it. Thanks for sharing!
cool….