A Petronas Tower
No-Man’s-Lands Journal Day 13 (Travel Diary Day 279)
Betsy has died. We have no idea if she’ll be revived. I think she sensed our betrayal.
Every time we begin a new adventure I become pensive – I wonder what our short and long term future holds for us. For me specifically, I often wonder if the HDR world needs, or wants, another photographer with an HDR blog. There are so many out there. I have no clue if this will become a solid career for me.
There are only a few things of which I’m certain in my life. Two of them are: Photography is the only occupation that has captivated me, that has left me feeling truly fulfilled. And I have no choice but to travel. It inspires me, and what is a life without inspiration?
Sometimes I turn to others for inspiration. Recently I came across the wise words of Alan Watts…
The Cool Bits – Technical Info
Processing Time: 2 hours
Processing method: Photomatix, Luminance Masks, Silver Efex
No. of Exposures: 3
EV Range: -2 0 +2
Aperture: f/10
ISO: 100
Focal Length: 10mm
Lens: Sigma 10-20mm
Camera: Canon 60d
Plugins: Nik Color Efex for Contrast adjustments, and shift in lighting.
Luminance Masks: Used to create fine contrast adjustments throughout the image.
Photomatix settings: Choose Default. Increase Strength to 100, Decrease Saturation to 35, Luminosity to 0, Lighting Adjustments to 2.5, White Point to 0 and Gamma to 82.
Join Me on Facebook or Google+
![]()
![]()
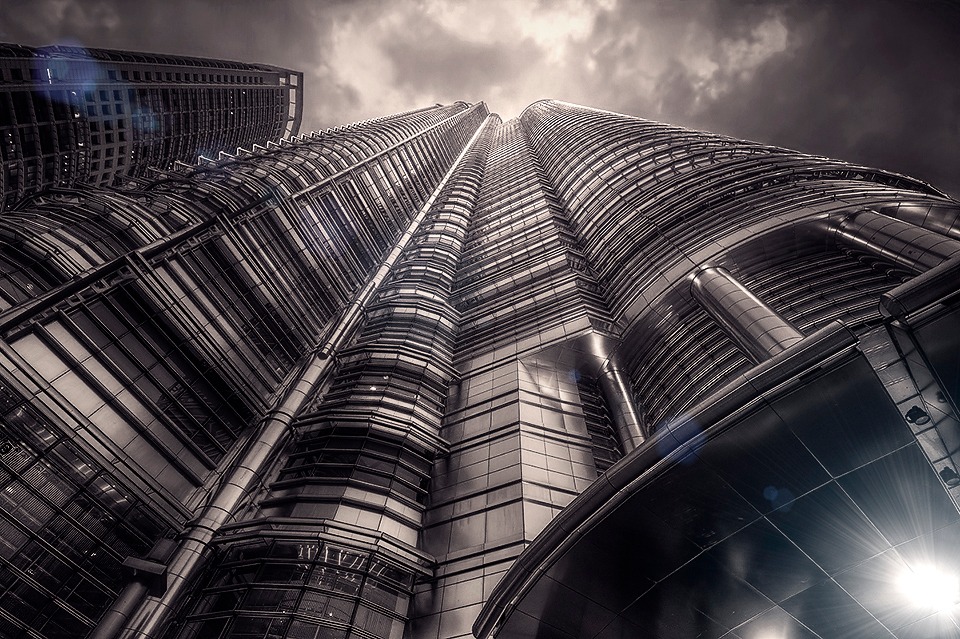
Today’s Photo – A Petronas Tower
Walking back to our hotel on a warm but slight damp evening, I was on the lookout for a composition of the Petronas towers was unique, or at least unique to me.
Pushing my wide-angle to its widest while virtually lying on the ground, I captured the image above. I’ve processed this before but I prefer the version.
Tip of the Day – Changing the Dynamic of Light in Your Images
Light is a wonderful thing. It controls the movement of our eyes while building mood in our images. Knowing how to shift the balance of light in your images will give you immense control over the mood you portray in them.
A wonderful way of changing the dynamic of light in your photos is by using a Levels layer to highlight certain areas.. This is a fairly common method. Firstly, choose where in the image you wish to lighten. On my image I chose the centre portion of the sky and the peak of the building. I used the Elliptical Marquee Tool in Photoshop, with Feather at 200, and selected that area, making a circular selection. I then opened a Levels adjustment layer and dragged the Highlights slider (the one on the right under the histogram) to the left slightly. And that was it.
If you wish you can select the same area, go to Select>Inverse, click on a new Levels adjustment layer and this time darken the image by altering the Mid-tones or Darks slider. Because you inverted the selection you will be affecting the rest of the image, not the area previously brightened, thus creating a dark vignette,
Available Tutorials:
Before the Joys of Post-Processing

Share this:

This entry was posted on Thursday, April 18th, 2013 at 3:07 pm
You can follow any responses to this entry through the RSS 2.0 feed.
Lovely work!
Thanks a lot Andrew!