Millennium Bridge
No-Man’s-Lands Journal Day 11 (Travel Diary Day 277)
Costa Coffee played host to Rachel and me as we planned our America trip today. Planning is not my strong point. Rachel, on the other hand, was born to be an organiser of things. We make a good team.
This morning I was given permission to shoot inside the Theatre Royal in Newcastle. It has a wonderful auditorium. The shoot is tomorrow morning. I really can’t wait.
The Cool Bits – Technical Info
Processing Time: 1 hour
Processing method: Photomatix & Luminance Masks
No. of Exposures: 3
EV Range: -2 0 +2
Aperture: f/8
ISO: 160
Focal Length: 10mm
Lens: Sigma 10-20mm
Camera: Canon 60d
Plugins: Nik Color Efex for detail enhancement, contrast adjustments, and shift in lighting.
Luminance Masks: The entire upper-half of the image is composed of manually blended exposures using luminance masks. The water, and lower part of the bridge is the result of tone mapping in Photomatix
Photomatix settings: Choose Default. Increase Strength to 85, Decrease Saturation to 35, Luminosity to 0, Lighting Adjustments to3, White Point to 0 and Gamma to 85.
Join Me on Facebook or Google+
![]()
![]()
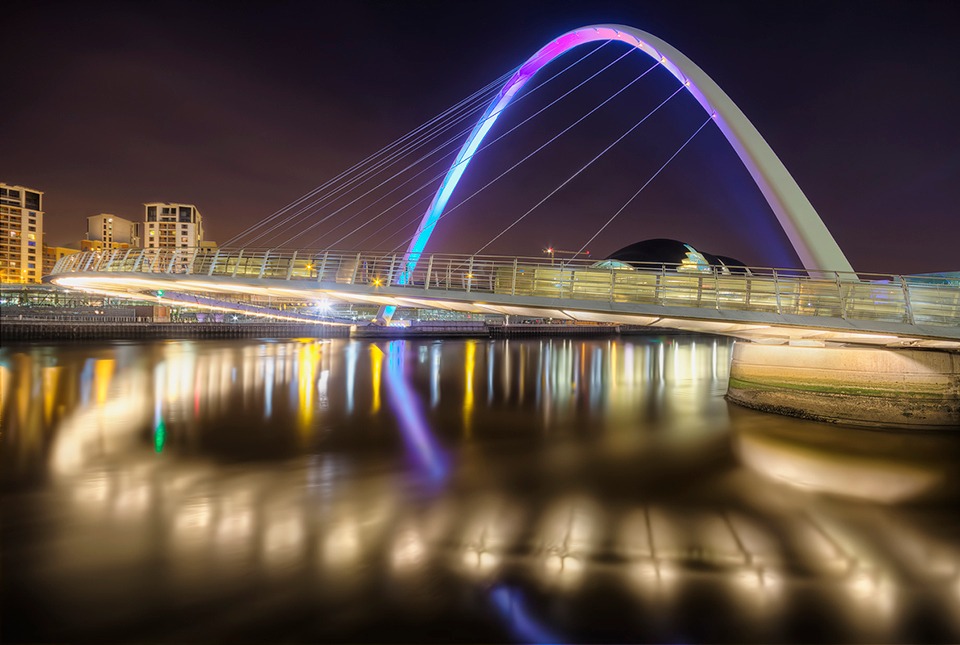
Today’s Photo – The Millennium Bridge
The Quayside in Newcastle is a surprisingly lovely place. Sitting outside the Pitcher and Piano on a sunny day, overlooking the river and its bridges is a joy. From a compositional perspective it is a difficult river to capture. We are resigned to stand on the sides of the bank, with obstacles either side of the main subjects of interest.
On this evening, my brother and I met a photography club up from Worcester. At first when I asked them about HDR they said ‘Oh no, I don’t do that’. After chatting a bit and showing them a few of my recent images, they asked me how to set up bracketing on their cameras.
HDR really does have an awful name in the world of photography. Just type HDR into google images and look at vast amount of poorly processed images on there. It’s now wonder the field is so poorly regarded. Fortunately, HDR seems to be becoming more and more popular and opinions in the next few years may begin to shift.
We’ll see.
Tip of the Day – Selective Detail Enhancement
If you would like to use a detail enhancement plugin or technique, it is often hugely more effective if you apply detail enhancement to only a few select areas. This will create an aesthetically pleasing contrast in your images. Take, for example, the white pillar/support to the bottom right of the image. I applied, through masking, detail enhancement to only that part of the image, which is contrasted nicely with the smooth water around it.
If you’d like to know how to enhance details in Photoshop, without the need for a plugin, see below for a quick explanation.
1. Duplicate background layer
2. Change the blend mode of the new layer to Vivid Light. Press ctrl + i to invert it.
3. Go to Filter>Blur>Surface Blur and use the settings 40 for Radius and 40 for Threshold.
4. Press Shift, Alt Crtl E to create a merged layer,
5. Now go to Image>Adjustments>Desaturate.
6. Finally, change the blend mode of the top layer to Overlay.
7. We’re finished but feel free to lower the opacity to soften the effect and mask out the areas that you don’t want to affect.
For a video tutorial on this, check out Scott Kelby’s travel photography talk around the 53 minute mark.
Available Tutorials:
Before the Joys of Post-Processing

Share this:

This entry was posted on Tuesday, April 16th, 2013 at 3:20 pm
You can follow any responses to this entry through the RSS 2.0 feed.
Very nice! Have you thought about putting RAW files out there for download to have people give a try and seeing if they can make the out come look as good as yours?